Table of ContentsI. Resources Used For This Guide
II. Introduction
III. WARNING
IV. Step One
V. Step Two
VI. Step Three
VII. Step FourI. Resources Used For This GuideDownload the example font I use in the guide by clicking on the colored link below:
01 Digitall FontYou will see and be able to use this font in another guide teaching about how to make a tech-oriented signature/technique! An extra font will never hurt
 II. Introduction
Fonts are extremely useful when it comes to photo shop. If creating your own custom text (with the help of a basic font of course) ain't your thing, then you're probably looking at a LOT of font installation.
This tutorial is very basic and well help you understand how to install and use a font for photoshop
III. WARNING:Not recommended that you use custom pixel fonts to type up a professional essay or anything else for school projects or businesses.
Moving on, there are four very basic steps for this tutorial.
IV. Step One
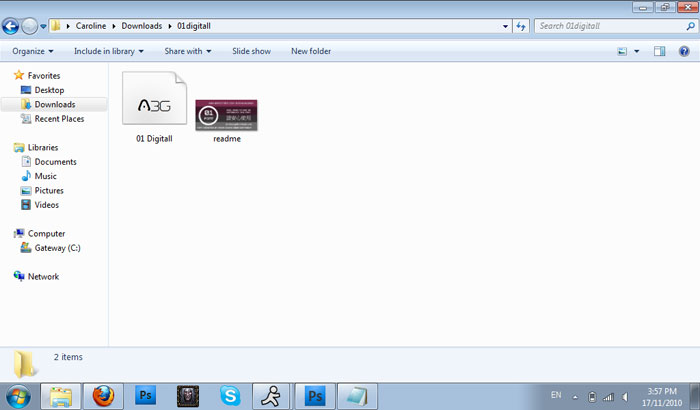
Download the font here and extract the folder. Open the folder and view the files. COPY the font file (not the readme)
V. Step Two
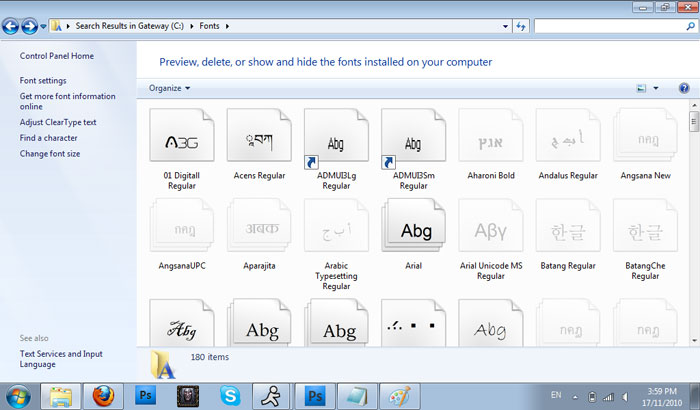
Find your main computer's fonts folder (whatever software you're using, it'll
be in the main hard drive and then the software folders. In my case, it's gateway hard drive C:
then WINDOWS and then Fonts)
VI. Step Three
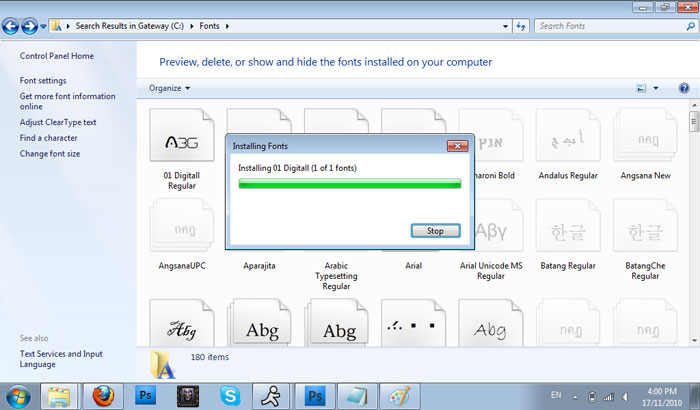
Paste your font file into the fonts folder with all your other fonts. It will then be automatically installed.
VII. Step Four
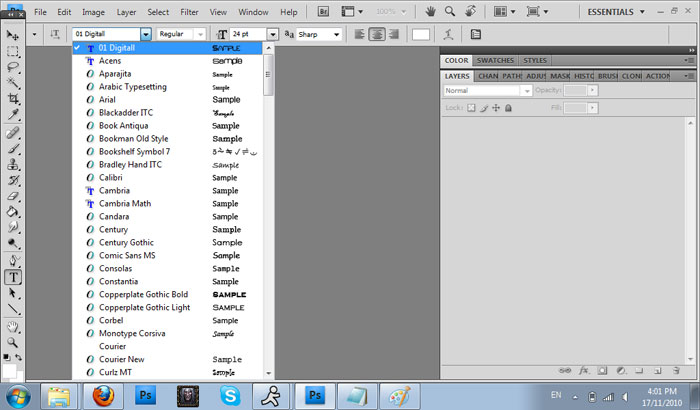
Double check in photo shop clicking the text button and opening the drop menu of fonts at the top. Fonts are organized alphabetically but with the 01 Digitall example it shows up right at the top of your list.
Be prepared to search for your font on the menu if it starts with the letter D and on! You can use the tiny blue 'T' symbols on the left side of the font title to help you search for your custom fonts!


